"mitsumonoAI" Basic Operation Guide
This manual explains how to use Login, Chat, Agent, and Workflow. It also covers the "My Mission" feature, which is essential for business efficiency, and tips for instructing the AI. Read this, and you will be able to master mitsumonoAI.

Introduction
mitsumonoAI is an AI tool that supports all business scenarios, from generating ideas for daily tasks to creating documents and materials. This guide provides a simple explanation of the basic usage of mitsumonoAI, which will significantly improve your work efficiency.
By reading this article, you will master the basic operations as well as convenient features like "Clip" and "My Missions."
What You Will Learn in This Article
- How to log in to mitsumonoAI
- Overview of the "Chat," "Agent," and "Workflow" features and when to use them
- How to use "History," "Clip," and "My Missions"
- Tips for giving instructions (prompts) to the AI
1. Basic Usage of mitsumonoAI (4 Steps)
mitsumonoAI is designed to be very easy to use. The basic flow consists of 4 steps: Log in → Select a feature → Give instructions to the AI → Check the results. First, let's cover these four steps.
【Step 1】 Log In
First, log in to mitsumonoAI.
- Access the Login Page
Open your web browser and access the login page: https://app.mitsumono.ai/login/en - Enter Your Email Address
When the login screen appears, enter your registered email address and click the "Continue" button. - Enter the Authentication Code
An email containing a login authentication code will automatically be sent to the email address you entered. Enter the authentication code from the email into the "Enter Code" field in mitsumonoAI. - Login Complete
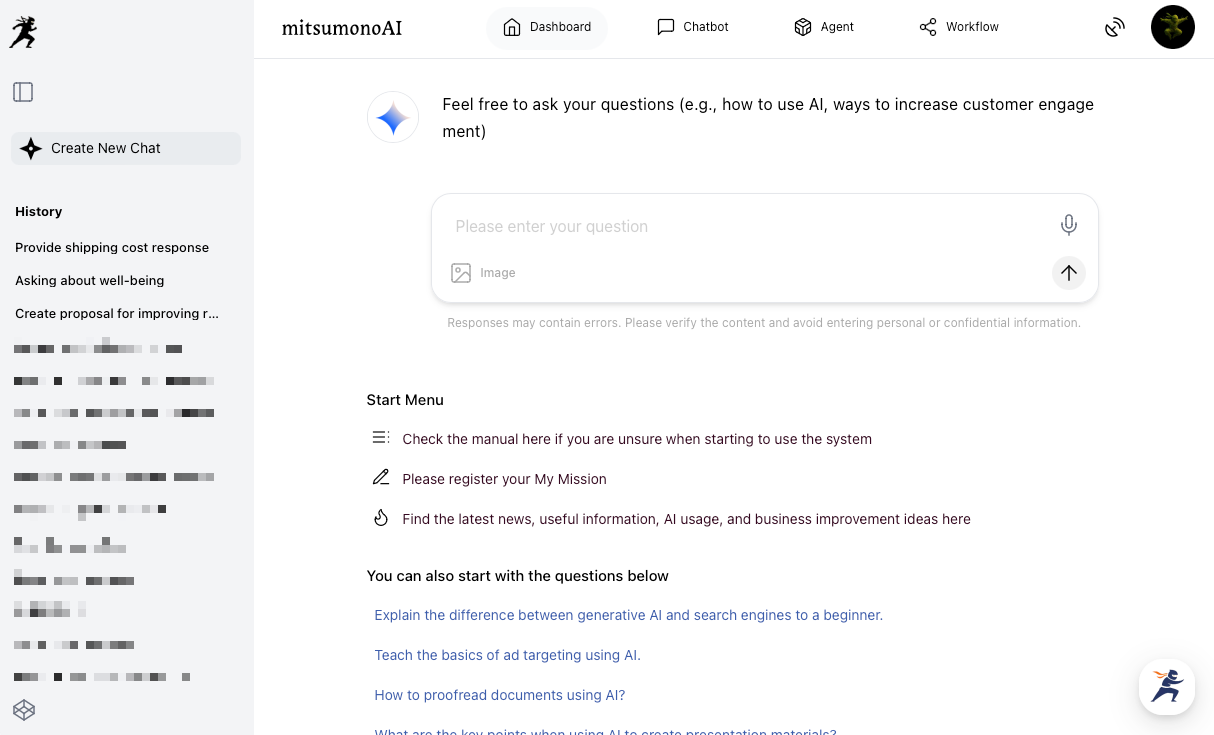
Once the authentication is successful, the mitsumonoAI home screen will appear. Your login is now complete.
【Step 2】 Select a Feature
mitsumonoAI offers various AI tools (features) for different purposes. A short description of each feature is written on the home screen; please refer to it.
Examples of Feature Selection
- "I want to brainstorm a marketing strategy for a new product with the AI" → Chat Feature
- "I want the AI to analyze my company's strengths and weaknesses" or "I want the AI to create a target persona" → Agent Feature
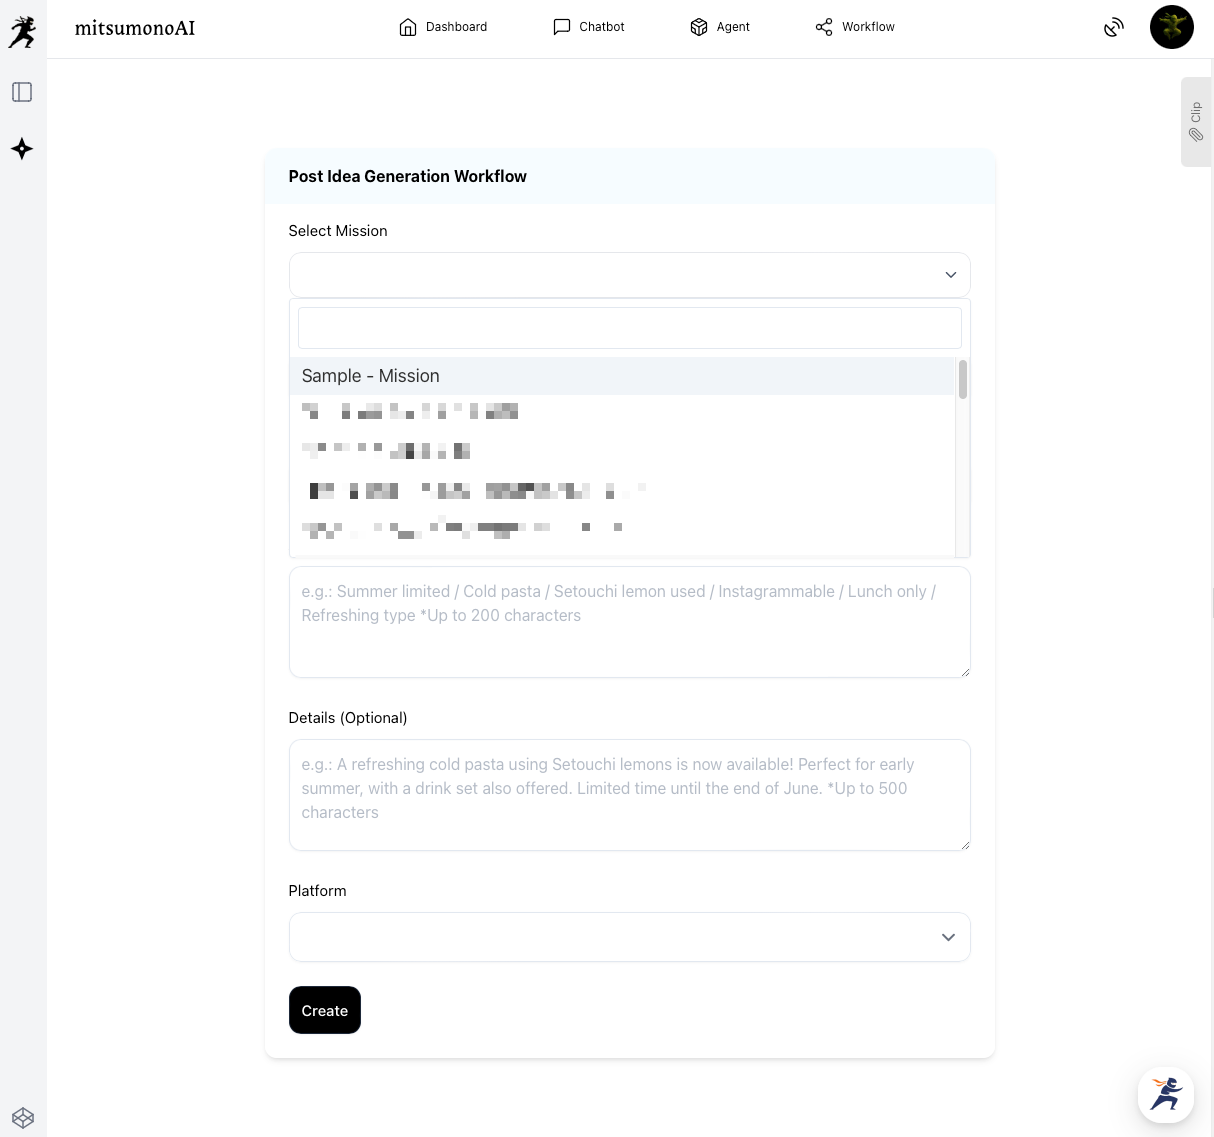
- "I want to write a blog post" or "I want to create an SNS post" → Workflow Feature
▶︎ Click Here for the Manual Page
You can find instructions for how to use each feature on this manual page:

【Step 3】 Give Instructions to the AI
When you select the feature you want to use, an input screen will appear. Here, you tell the AI exactly what you want it to do. (This instruction is called a "prompt.")

Basic Flow
- Enter Necessary Information
Each feature typically provides fields for you to enter the necessary information to achieve your objective. Filling out these fields helps the AI produce good results. - Click the Generation Button
Once you have finished entering the information, click a button such as "Create," "Generate," or "Analyze." The AI will generate a response based on the content you entered. - Check the Results
After the AI's response is output, check the content. If the result is not what you expected or if you want to add more information, you can correct or improve the result by providing additional instructions.
2. The Three Features of mitsumonoAI
mitsumonoAI offers three features that can be used according to your business objectives and challenges. Understanding the characteristics of each and using them appropriately for the situation will significantly improve the efficiency and quality of your work.
Chat: Expand Ideas and Gather Information Through Dialogue with AI
The "Chat" feature has two types: "AI Models," which allow direct use of the latest large language models, and "Sensei AI," which specializes in knowledge specific to certain industries.
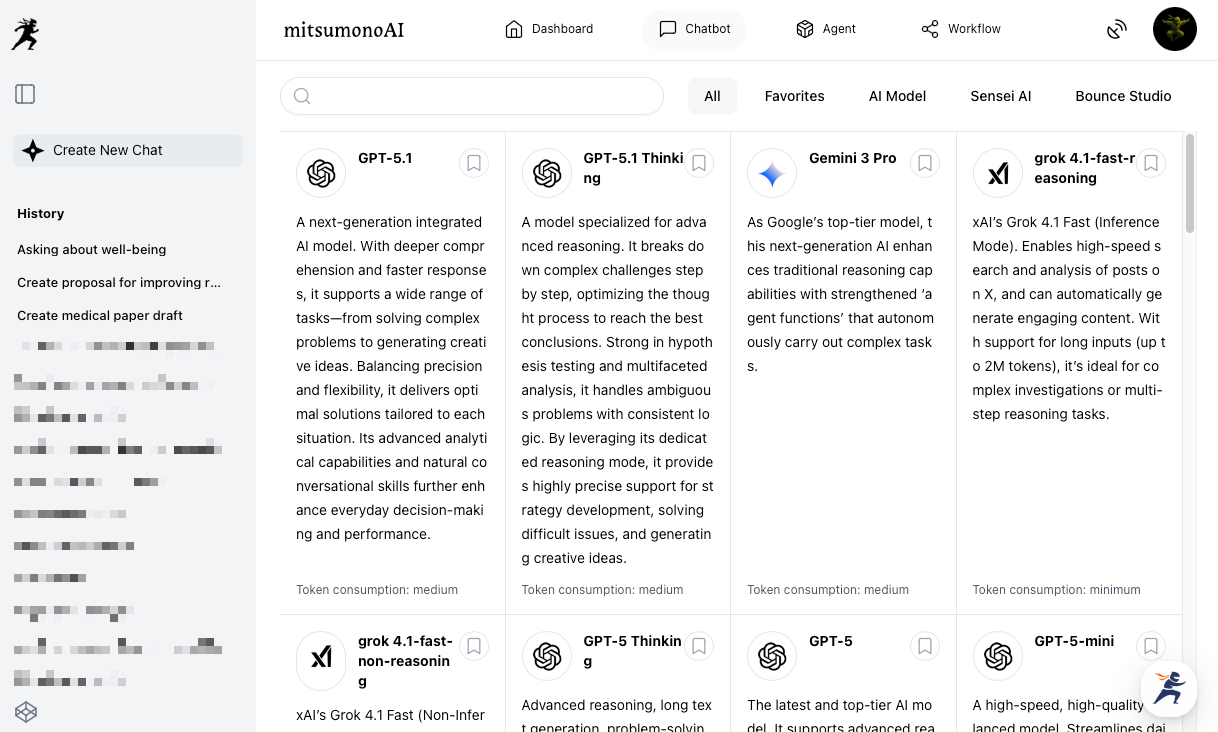
AI Models
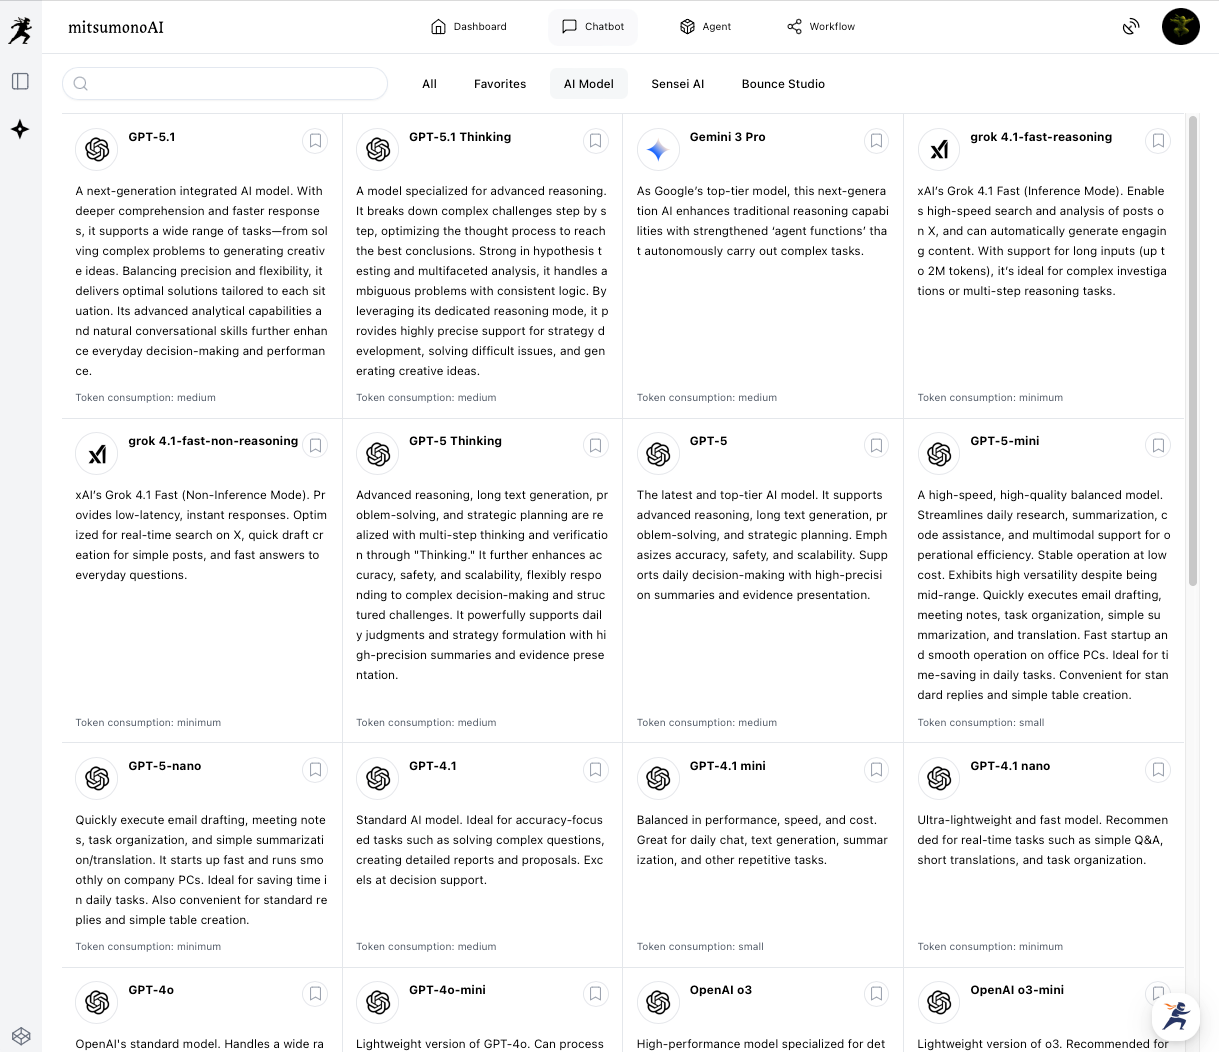
You can select and directly interact with world-leading generative AIs such as ChatGPT, Claude, and Gemini. AIs differ in their areas of expertise, speed, and cost. You can choose the optimal AI for your purpose.
You can choose from a wide lineup, ranging from the newest and highest-performing models to models that excel in speed and cost-performance.
Sensei AI
These are AI consultants with specialized knowledge tailored to specific industries such as "Restaurants," "Accommodation," and "Manufacturing."
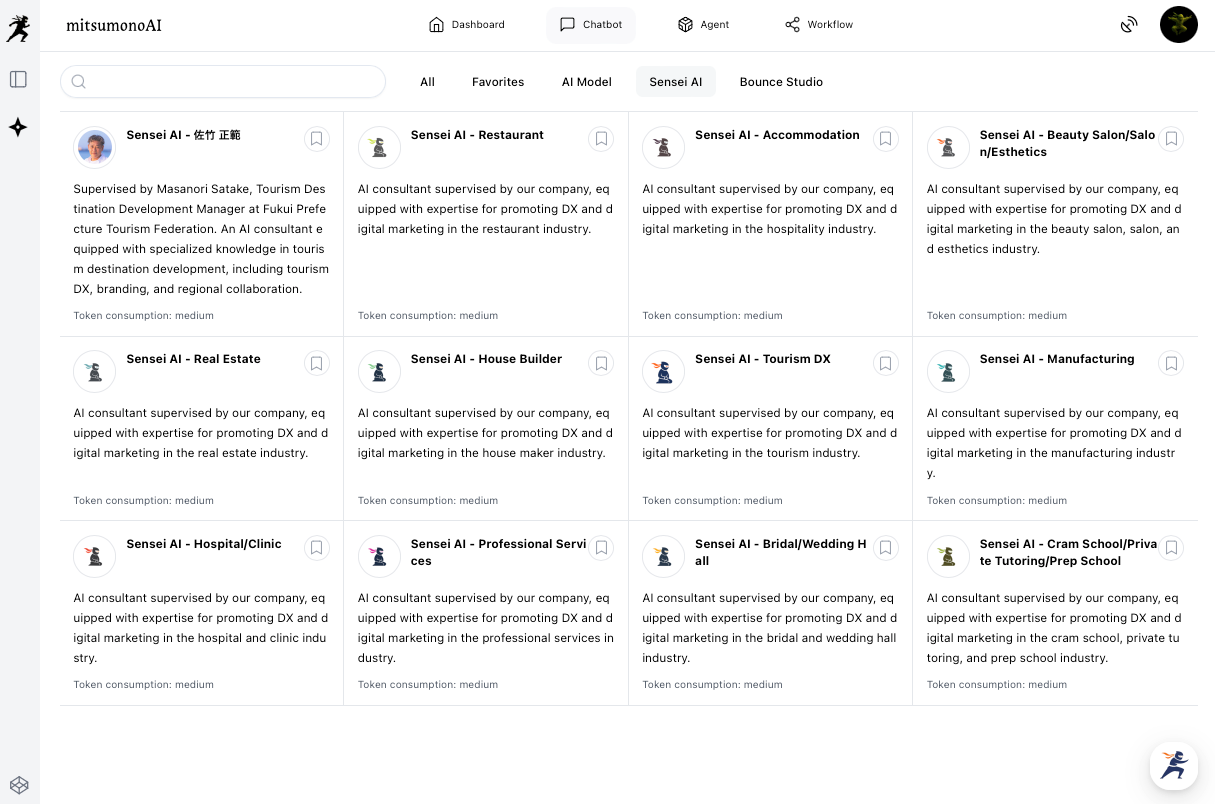
AI consultants equipped with specialized knowledge in industry DX (Digital Transformation) and digital marketing provide accurate and practical advice. (They are supervised by our company or experts in each field.)
Their key feature is the ability to propose specific measures and strategies that consider the industry context, which cannot be obtained from general-purpose AI.
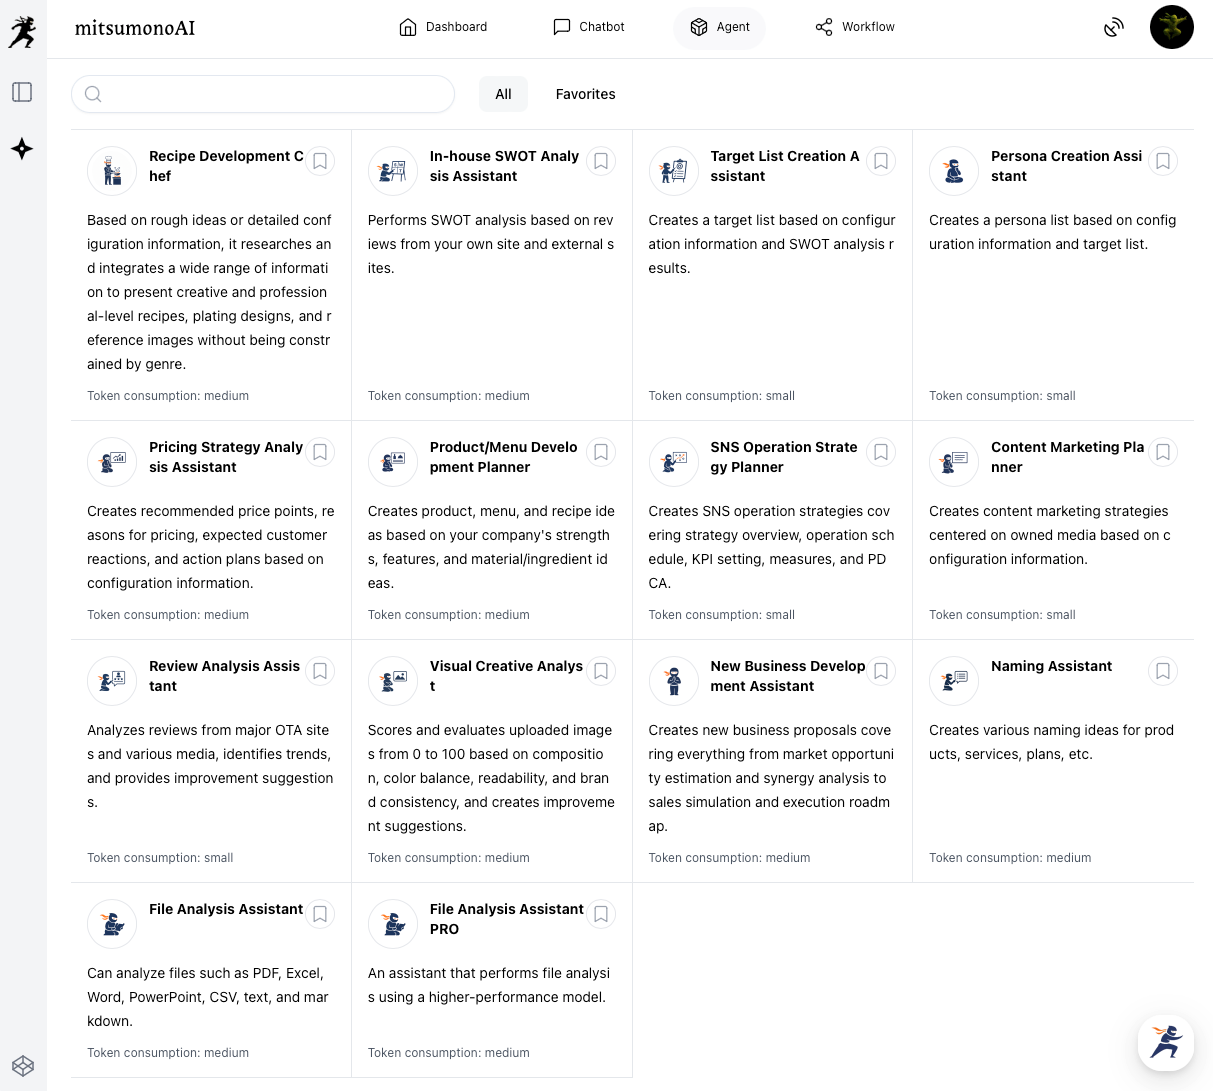
Agent: Specialists That Automate Specific Business Tasks
The "Agent" feature consists of AI assistants designed to perform specific business tasks, such as "SWOT Analysis," "Persona Creation," and "SNS Operation Strategy Planner."

By simply inputting the required information, you can quickly create high-quality deliverables, significantly streamlining your work.
Agents handle various specialized business tasks, including marketing, planning, and analysis. Because they are optimized for each specific task, you can expect highly accurate output.
Features
- Task-Specialized
Since they specialize in one clear objective (e.g., creating a target list), there is no need to give complex instructions. - High-Quality Deliverables
Agents are designed to generate deliverables based on specialized frameworks and knowledge, resulting in more comprehensive and higher-quality output than what can be created manually or with general AI models.
Workflow: Streamline Document Creation Tasks
The "Workflow" feature efficiently executes document creation tasks that frequently occur in daily work, such as "creating blog articles" and "writing SNS posts."
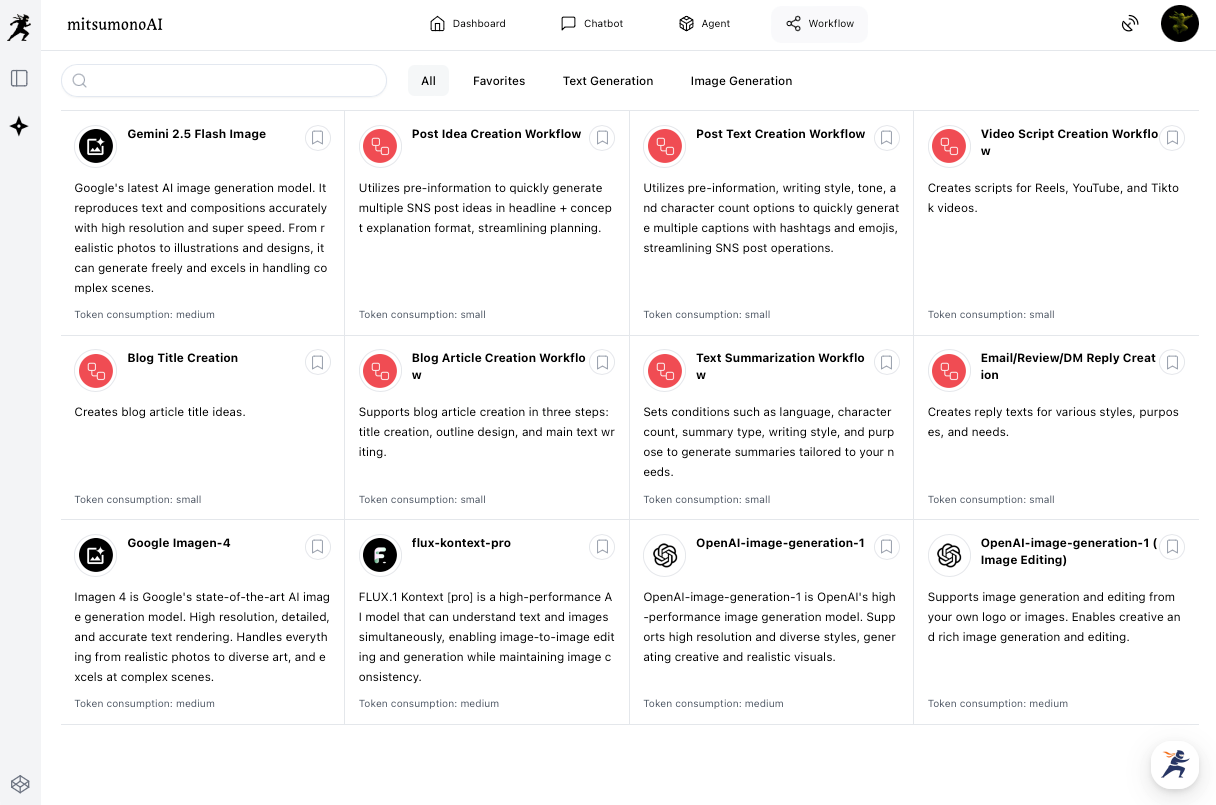
You can easily create high-quality deliverables by simply answering the AI's questions or filling in the displayed fields.
Because the entire process for achieving the goal is designed, it eliminates the worry of not knowing where to start and streamlines your writing tasks.
Features
- Easy Operation Requiring No Specialized Knowledge
No difficult operations or complex prompts are needed. The task is completed simply by entering the required information into the designated fields. - Efficiency of the Entire Process
The AI seamlessly supports the entire process required for document creation, from brainstorming and outlining to drafting the main body and devising titles. This significantly reduces the total time spent on the work.
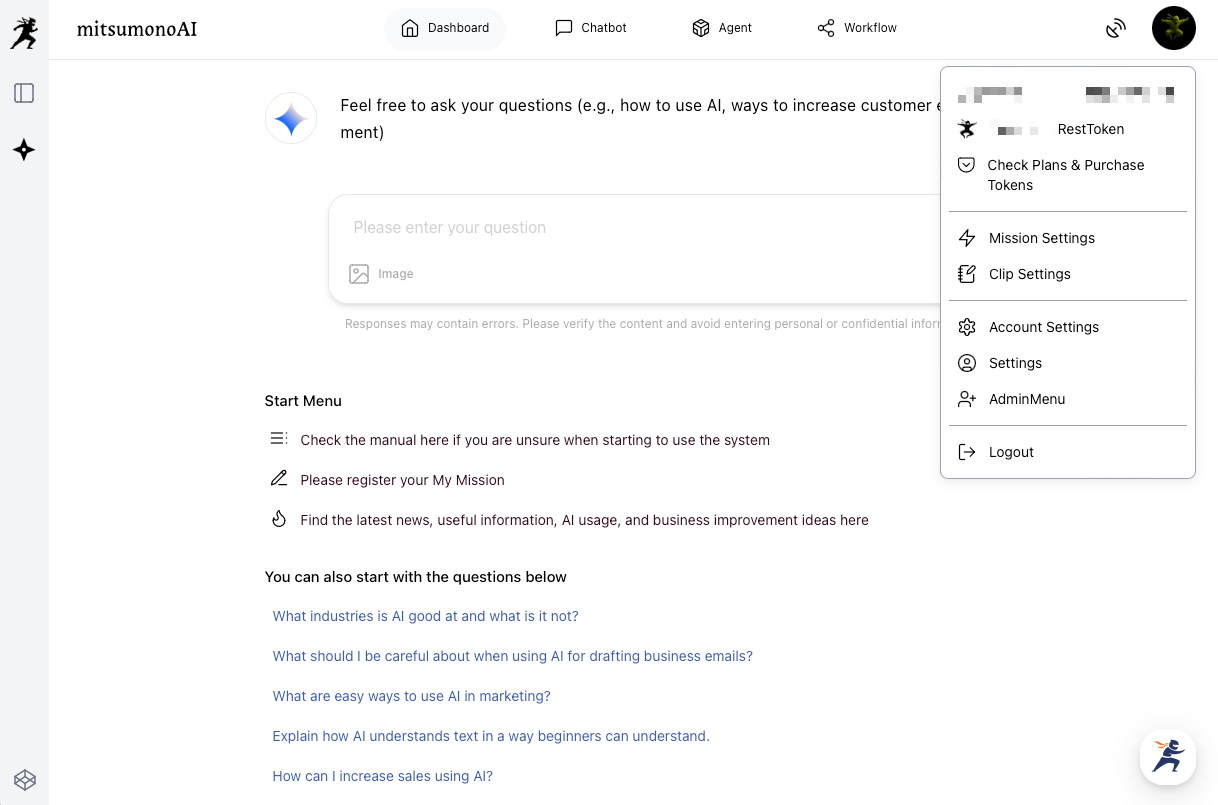
3. 【Crucial】 My Missions Feature: Initial Setup Before Starting
Before you get used to the basic operations, the first thing we highly recommend you set up is the "My Missions" feature. This is an extremely important initial setting to allow the AI to deeply understand your business and work content, evolving it into an excellent assistant dedicated solely to you.
Crucially, some Agent and Workflow features cannot be used without a registered "Mission." Be sure to complete this setting immediately after your first login.
What is the My Missions Feature?
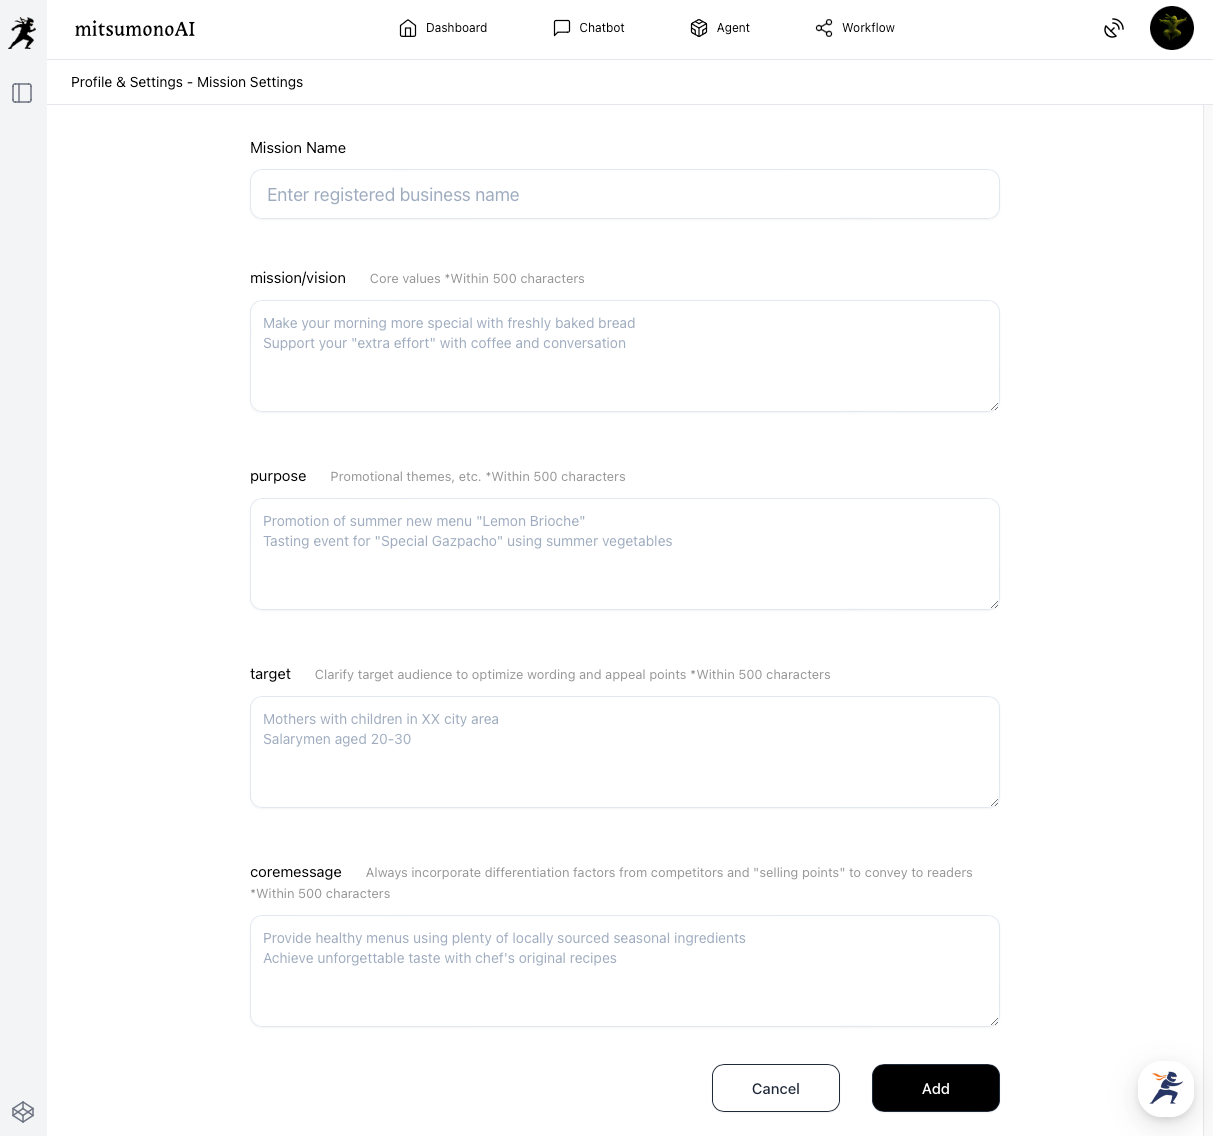
It is a feature that allows you to register your business content and objectives with the AI, enabling it to generate accurate responses aligned with the context of your business. By performing this setup, the AI evolves into a highly capable assistant dedicated to your needs.
How to Register a My Mission
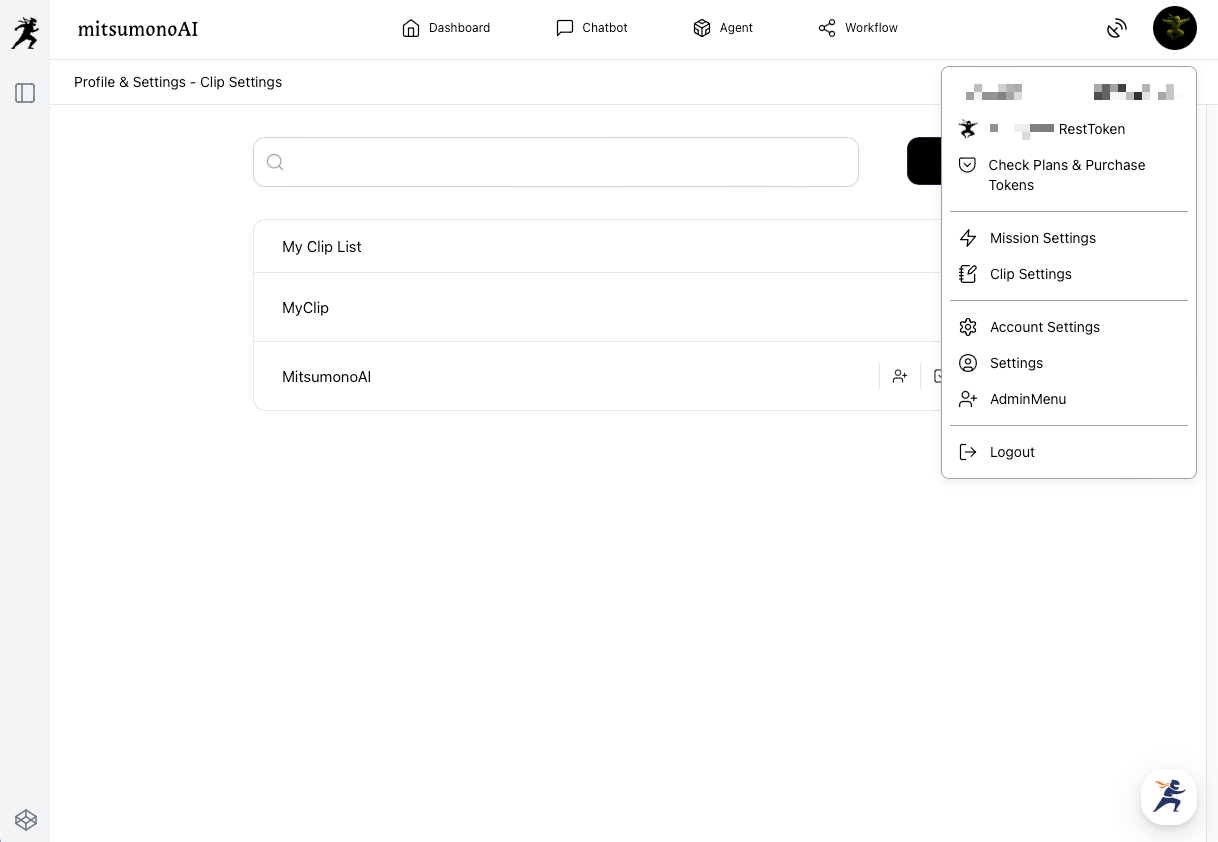
1.Open the Menu
Display the menu from the icon on the right side of the screen and select "Mission Settings."
The "My Mission List" screen will appear as shown below.You can add a new My Mission from the "Add" button in the upper right corner.
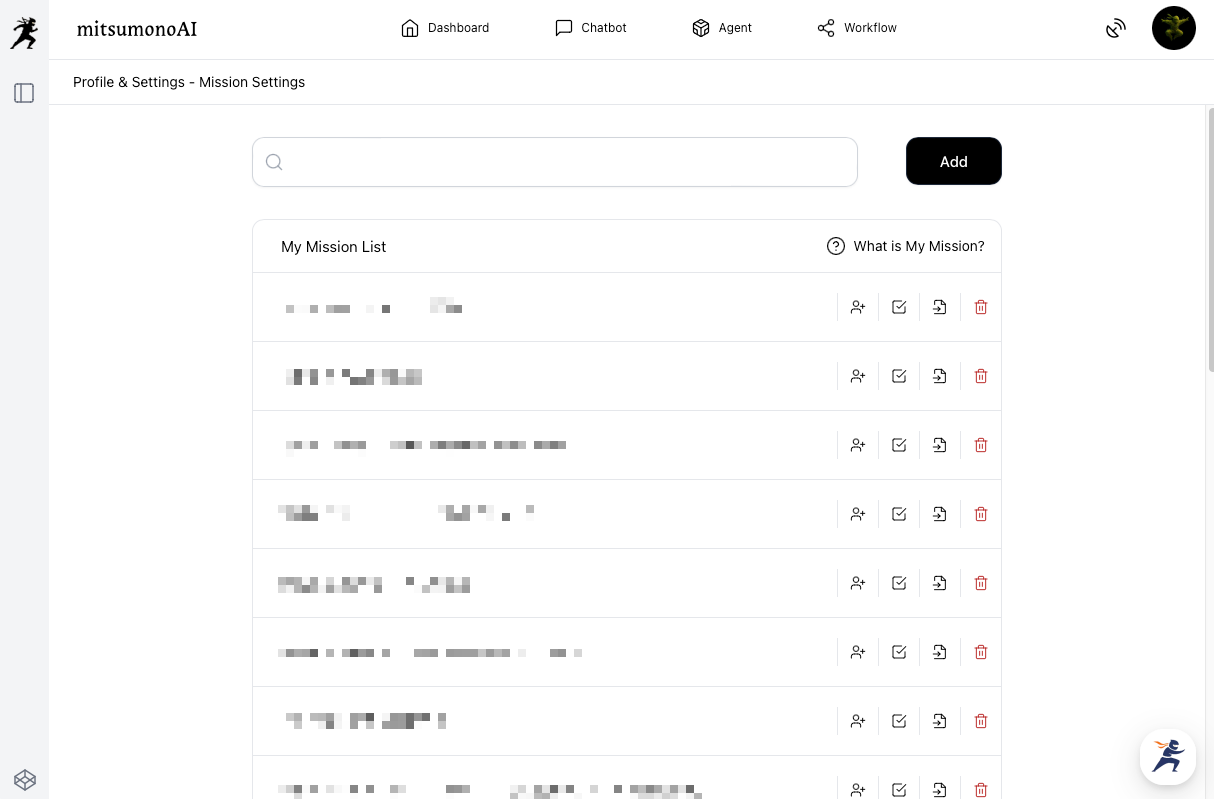
2.Enter Specific Information in Each Field
Register the details of your business or plan, referring to the displayed input examples. Once all input is complete, click the "Add" button in the lower right corner of the screen to save this mission.
3.Use the Relevant Mission from "Mission Selection"
This allows you to select the mission you just registered from "Mission Selection" within the designated features.
Benefits Provided by the My Missions Feature
- Consistent Content Generation
Since the AI understands your business content, it outputs information tailored to your objectives and target audience, regardless of the medium (such as a blog or SNS). This creates message consistency, leading to stronger brand image. - Improved Accuracy and Practicality of Responses
Because the AI answers with an understanding of your business, it creates specific, immediately actionable proposals and deliverables, not just general statements. - Efficient Workflow Execution
You eliminate the need to explain your business prerequisites in every conversation, allowing you to start working on the main topic immediately. Furthermore, organizing your company's strengths and targets during the Mission setup clarifies your business strategy.
▶︎ For those who want to know more about the detailed setup process
We have prepared a "Mission Registration" manual with even more detailed setting methods and input tips for each field.

▶︎ For Those Who Want to Know Specific Registration Examples and Usage
The collection of use cases provides abundant examples of missions you can register and use immediately, as well as samples of effective instructions (prompts). By using mitsumonoAI according to the articles, you will immediately realize its effectiveness.

4. Features for Further Improving Work Efficiency
Once you are familiar with the basic operations, let's utilize the convenient features to get even more out of mitsumonoAI.
4-1. History
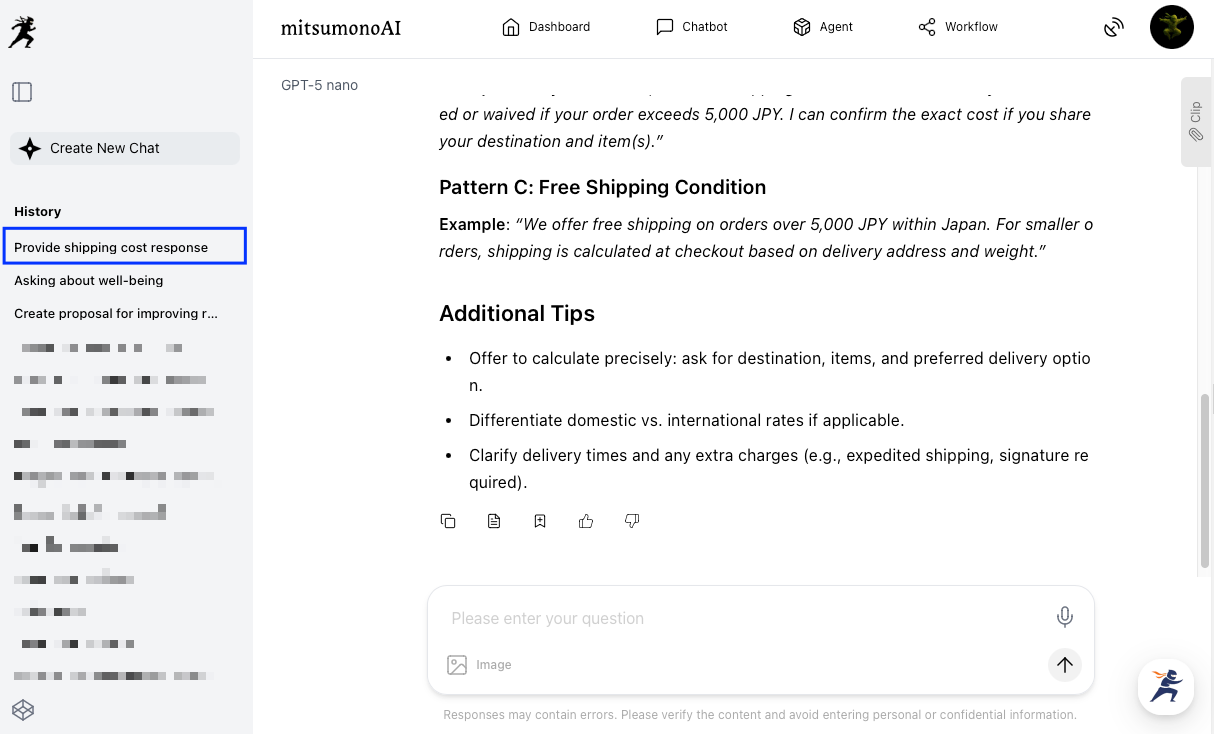
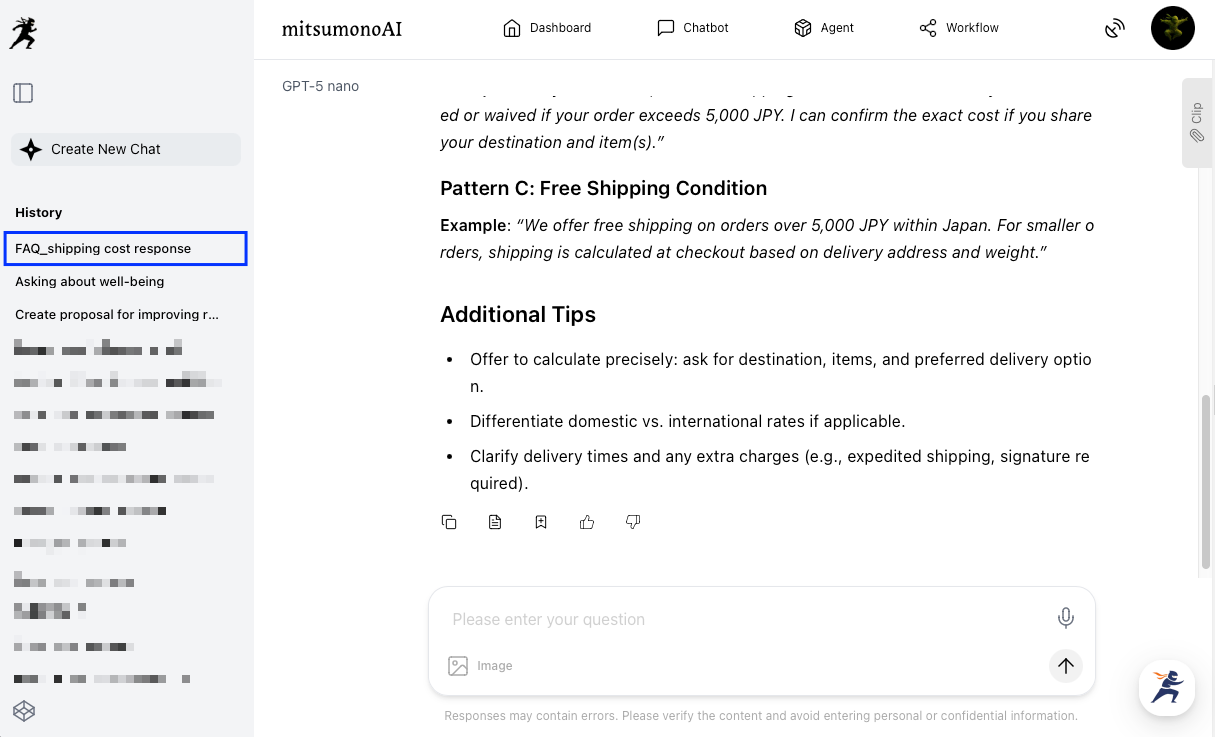
The results output by each feature are saved as history for 90 days.
You can view the history by clicking the History icon on the left side.
Viewing History
Click the name of the history you wish to view, and the corresponding output result will be displayed.
Editing the History Title
1.Display the Title Edit Screen
Hover your cursor over the title of the history you want to edit. A mark with three dots will appear to the right of the title.

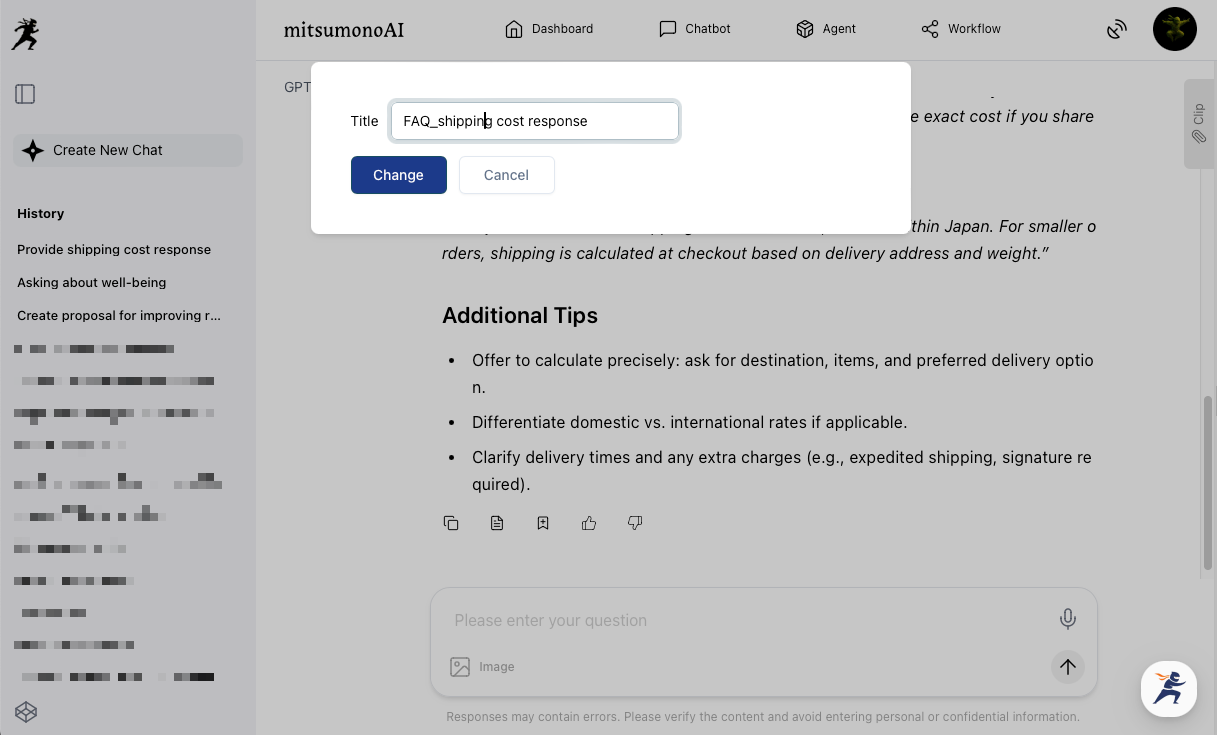
2.Edit the Title and Save Changes
Click that mark and select "Rename" to display the editing screen. Enter the new title and click "Change."
3.Confirm the Change
Verify that the title has been changed in the History List.
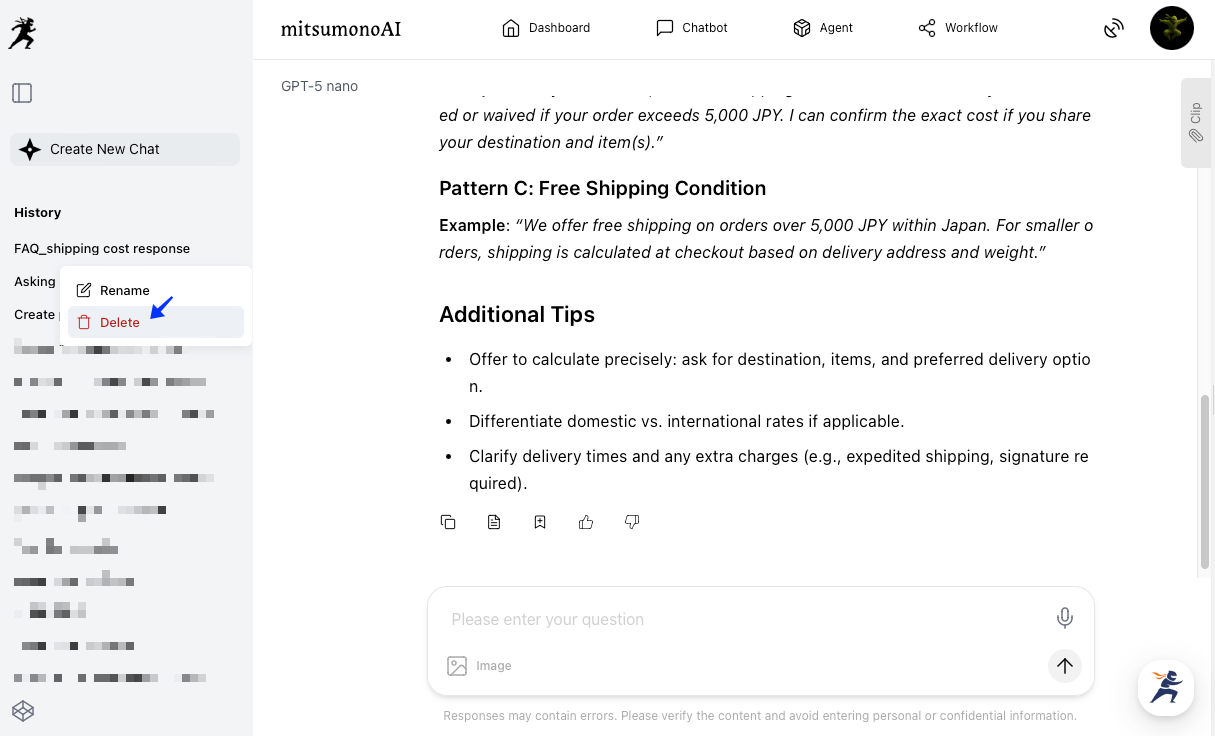
Deleting History
1.Display the Title Edit Screen
Hover your cursor over the title of the history you want to delete. A mark with three dots will appear to the right of the title.

2.Select "Delete" from the Options
Click that mark and select "Delete" from the displayed menu.
3.Execute Deletion
A final confirmation, "Are you sure you want to delete this?" will appear. Review the content and click "Delete."
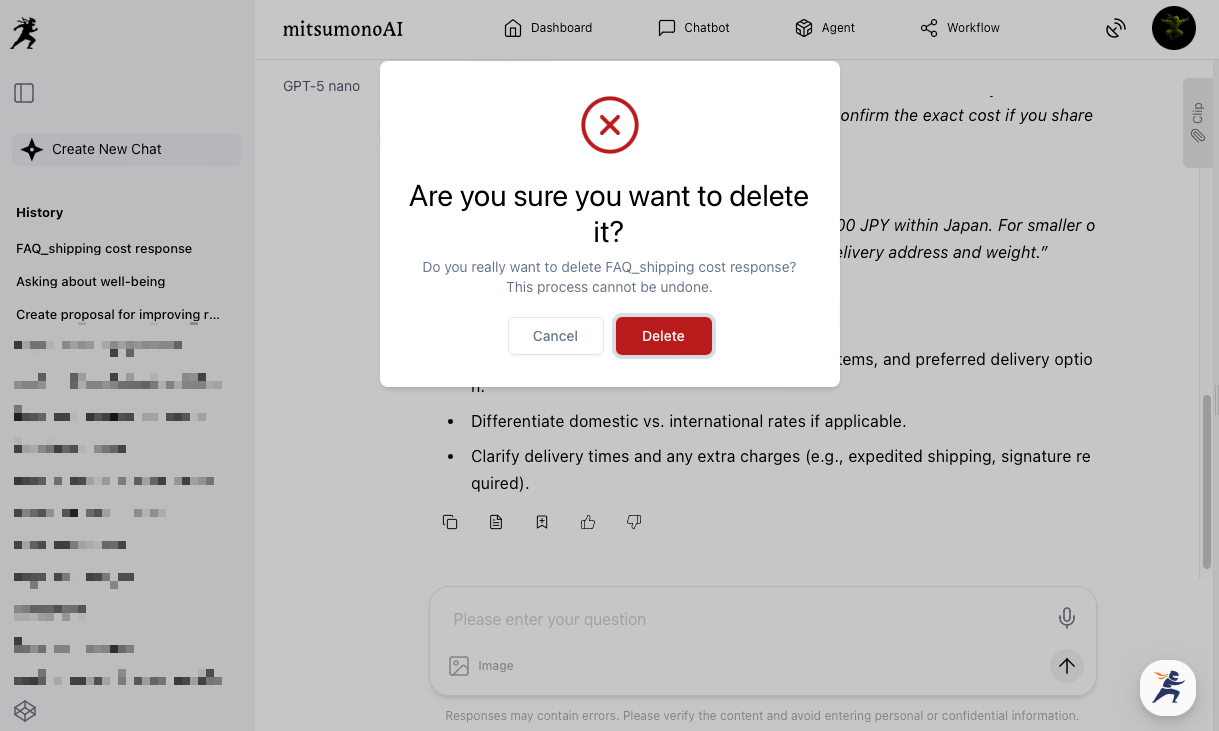
4.Confirm Deletion
A notification reading "Chat history deleted" will be displayed. Verify that the corresponding history has been removed from the History List.
4-2. Clip
"Clip" is a feature that allows you to save and manage information you want to refer back to later, such as AI output results, notes, or ideas.
Basic Usage (3 Patterns)
- Save the entire output result by clicking "Save to Clip" displayed at the end of the result.

- Select and copy a part of the output result, paste it into the input field of the "Clip" in the side menu, and click "Add" to save it.
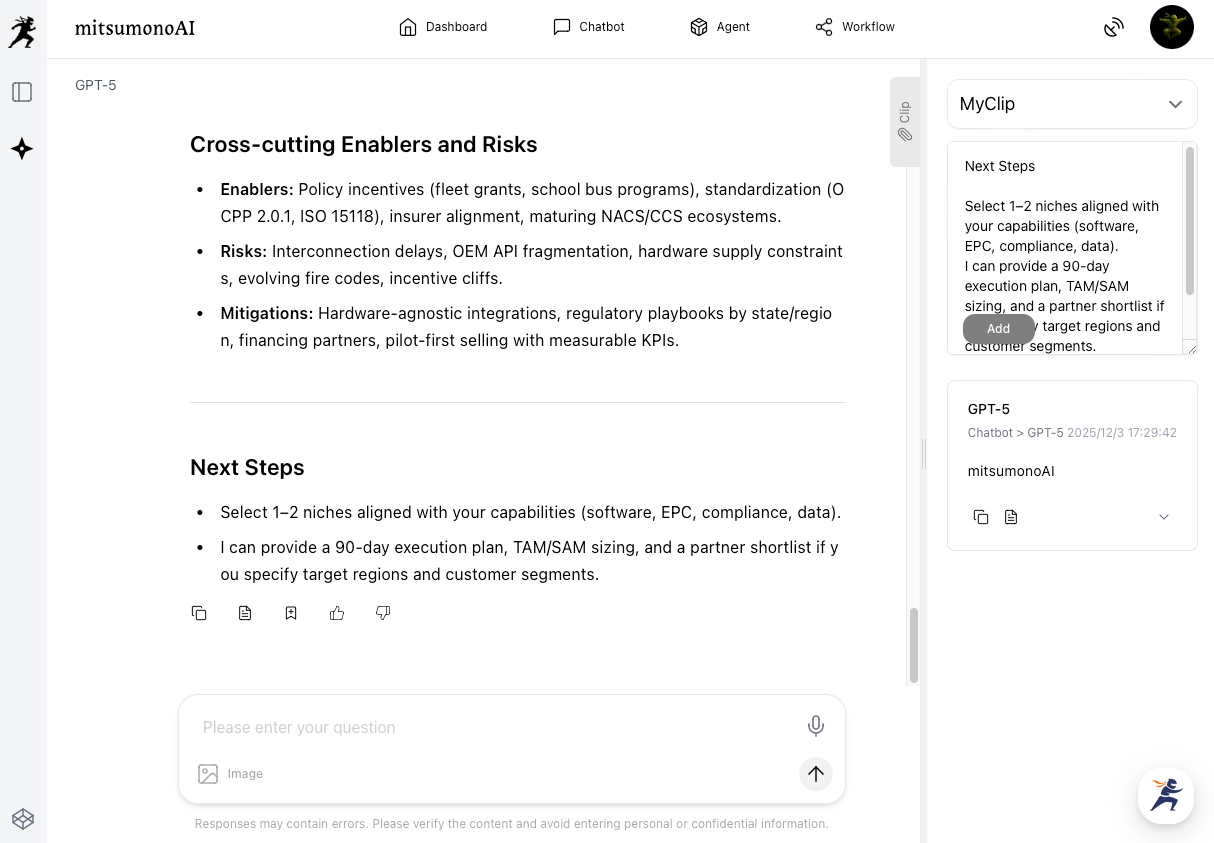
- Directly enter and save notes or additional content into the input field of the "Clip" in the side menu.
Confirming, Editing, and Deleting Clips
Saved clip information can be checked, managed, and edited in the following two ways:
1.Clip Window (Add, Check, Edit, Copy, Delete)
You can check, edit, and delete saved clips at any time by opening the "Clip Window."
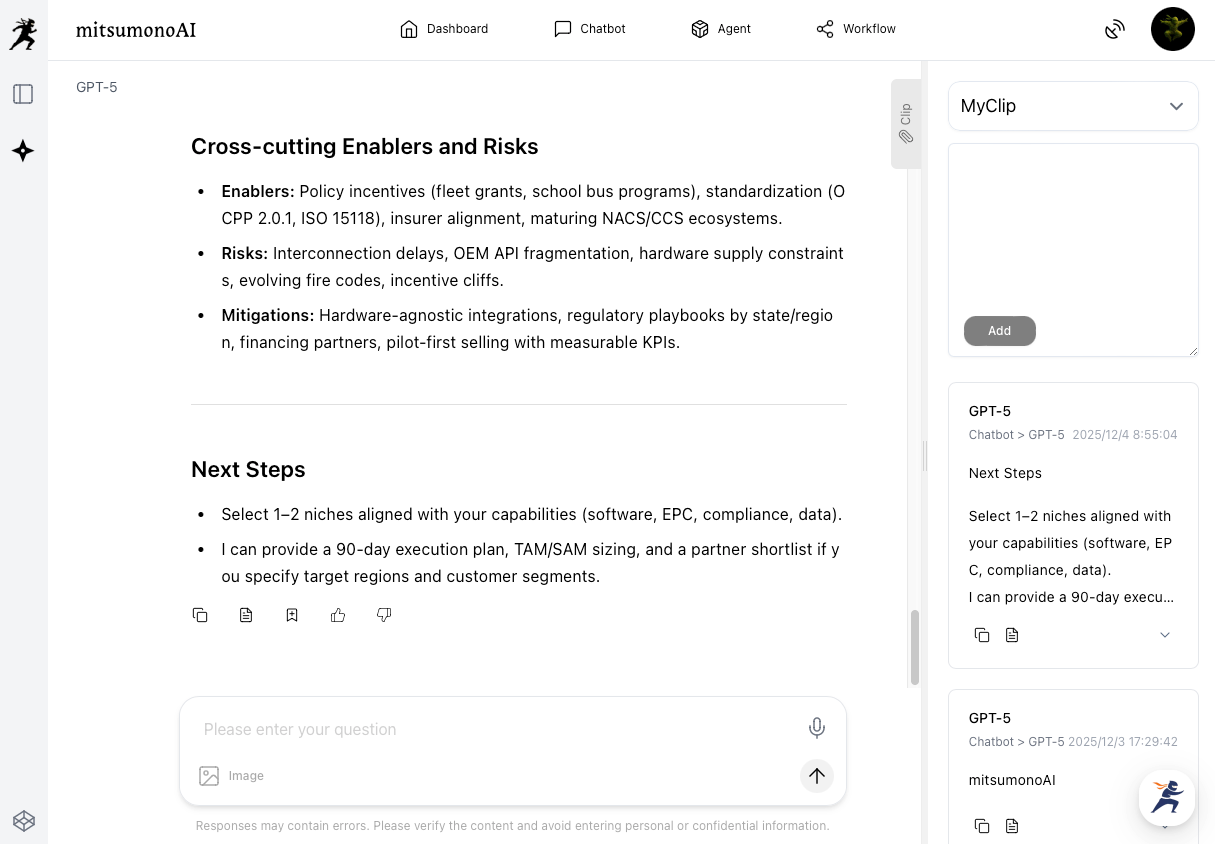
By copying and pasting the saved clip information into the designated field of other features or into a conversation with the AI, you can utilize it in the output results of those other features.
2.Clip Settings (Add, Confirm, Edit, Copy, Delete)
By selecting "Clip Settings" from the menu displayed when you click the icon, you can manage your saved clips—including checking the list, organizing them into folders, moving them between folders, and deleting them.
▶︎ For those who want to know more about detailed usage
We have prepared a manual that thoroughly explains the operation method and tips for utilizing the Clip feature.

Examples of Clip Utilization
- Stocking frequently used phrases or standard texts.
- Saving insightful market analysis data to quote in documents later.
- Clipping the analysis result from the "Company SWOT Analysis Assistant" to use as a reference when inputting data into the "Target List Creation Assistant."
5. Tips for Dialogue to Maximize AI Capability (Prompt Hints)
To get the optimal answer from the AI, "how you give instructions (i.e., the prompt)" is extremely important. This is the most crucial point, applying not only to free dialogue in Chat but also to "My Missions" and the input fields of each feature.
Fundamentals of a Good Prompt: Be “Specific” and “Clear”
AI thinks only based on the information you input. This is a crucial point both when conversing with the AI and when registering a mission.
To convey your objective accurately, try to be mindful of the following points:
- Communicate the Background and Conditions
For example, if you want to brainstorm ideas with Sensei AI, providing specific preconditions and background information, such as:
"I'm planning a sales promotion for a new product. The target audience is women in their 20s, and the budget is 1 million yen." will lead to more realistic and accurate suggestions.
- Specify the Output Format
Telling the AI the desired format for the output reduces the effort needed for revisions.
"Please provide 3 suggestions in a bulleted list." "Please summarize this in a table format."
- Refine Through Dialogue
You don't need to aim for a perfect answer on the first try. Generative AI excels at improving accuracy through repeated interaction. By communicating corrections and additional requests, you can get closer to the ideal result.
- Making Additional Requests
"Please explain this in a way a middle school student can understand."
"Please provide 3 more ideas from a different perspective."
- Requesting Corrections
"Please use more formal language."
"Also tell me the disadvantages and risks of that proposal."
Summary: Make mitsumonoAI Your Strongest Business Partner
This guide has explained mitsumonoAI's basic operations, along with key features and tips for maximizing its capabilities. Finally, let's recap the important points.
- Basic Operation is 4 Steps
Remember the simple flow: "Log in → Select a feature → Input instructions → Check results." - Utilize the 3 Main Features Appropriately
Choose the optimal feature based on your goal: "Chat" for brainstorming, "Agent" for automating specific tasks, and "Workflow" for streamlining document creation. - The Most Important Setting: "My Missions"
Start by registering your business information in "My Missions." - Nurture the AI Through Dialogue
Do not stop at a single instruction. By engaging in repeated dialogue to refine the answer, the quality of the output will dramatically improve.
mitsumonoAI is your thinking partner in business and an excellent assistant that efficiently handles tedious tasks. We encourage you to use this guide as a reference, actively incorporate the tool into your daily work, and experience its benefits firsthand.
Once you have mastered the basic operations, it's time for practical application. "How can I use this in my job to make things more convenient?" "Can I utilize this more effectively for creating marketing plans or sales materials?"
For those with these questions, we have prepared a practical guide that introduces specific usage methods by job role and business scenario. Please find the hints that will dramatically streamline your work.